Installing CUDA for older GPU
|
If you have an older GPU (RTX40xx or older), then getting the AI to use them is rather simple:
After installing the card and its drivers, you also need to install both the "CUDA Toolkit for Windows" and the
"CUDA Deep Neural Network" (cuDNN) library. All of these can be found on the Nvidia web site (you will need to fill in the "developer's" form first before you get the cuDNN library). Since we will ask you to install a specific version of the Python "TensorFlow" library, the ideal is to also install specific versions of the CUDA toolkit and the cuDNN library. Note: Since the program is compiled with older versions of Python, it is actually faster with GPU that use CUDA 11. So, you are better with a RTX30xx or RTX40xx than with a newer generation! |
Installing CUDA Toolkit 11
|
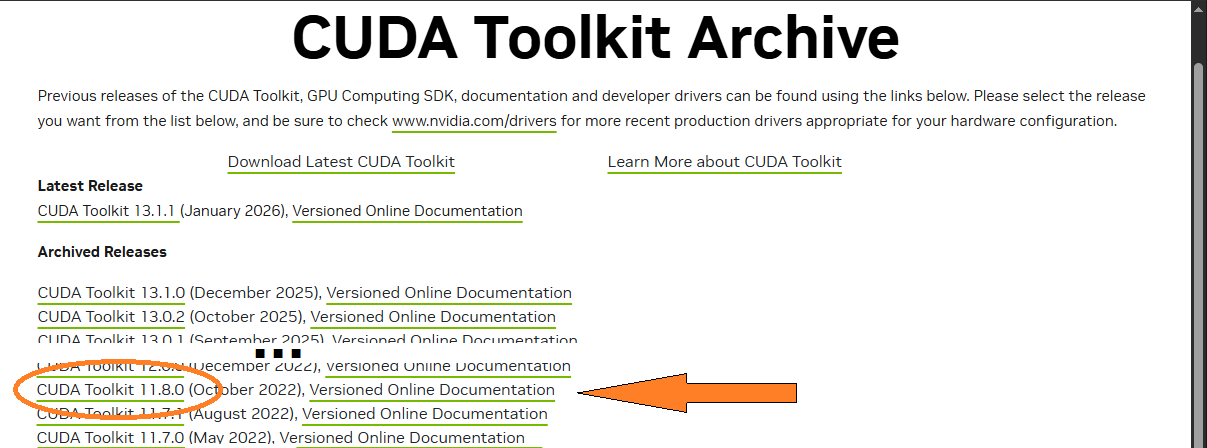
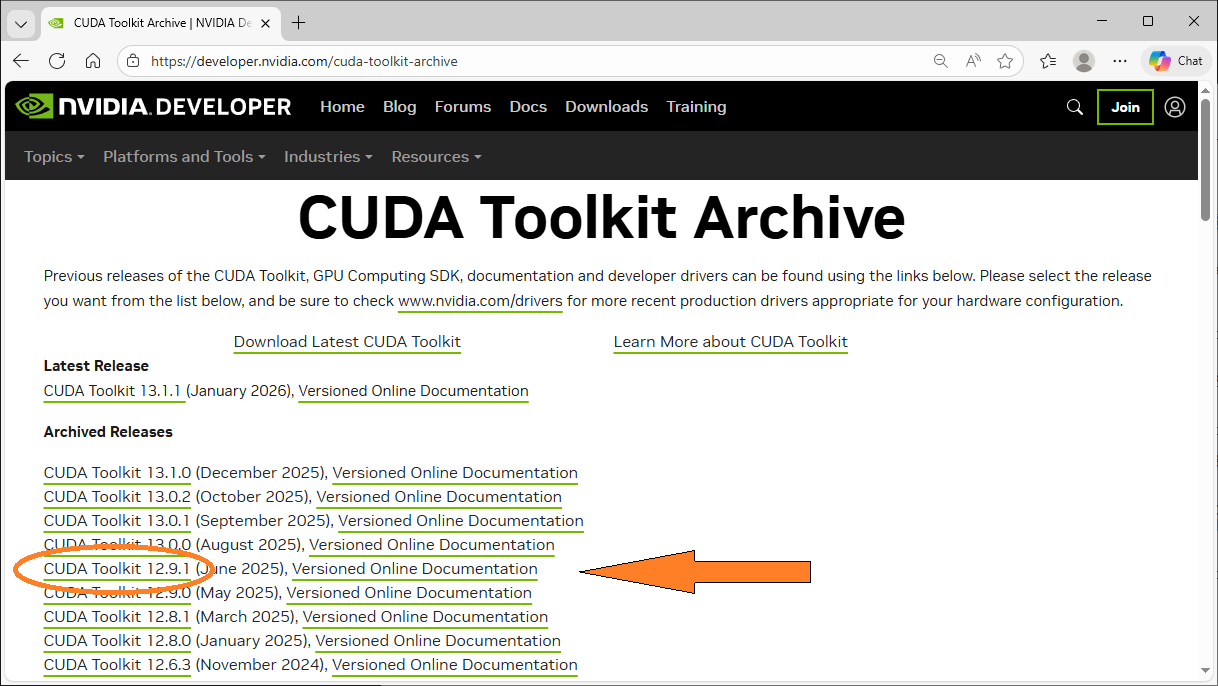
The official compatible versions is "CUDA Toolkit V11.2". But, since any version of V11 seem to work, you might as well install the latest one: V11.8.)
(you can find it here:
https://developer.nvidia.com/cuda-toolkit-archive.
) |
|
|
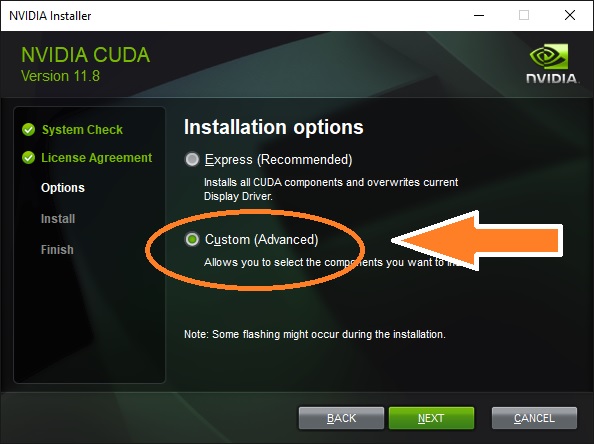
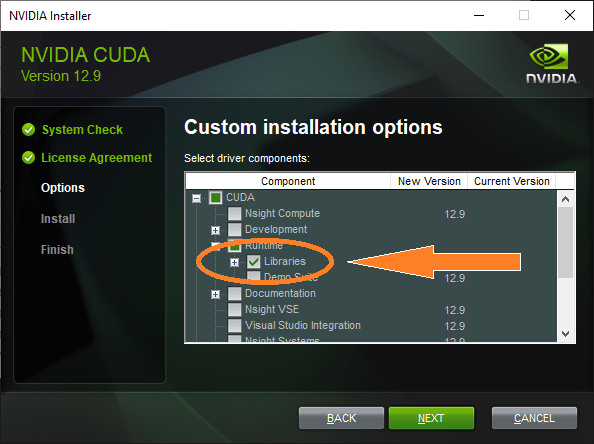
The installation will be "unpacked" to a temporary directory and then it will execute. You will see a screen about the "System Check", you you will have to accept the license agreement. Please note that you only need the runtime libraries for AI to work. So in the installation, select the "Custom (Advanced)" installation option. |
|
|
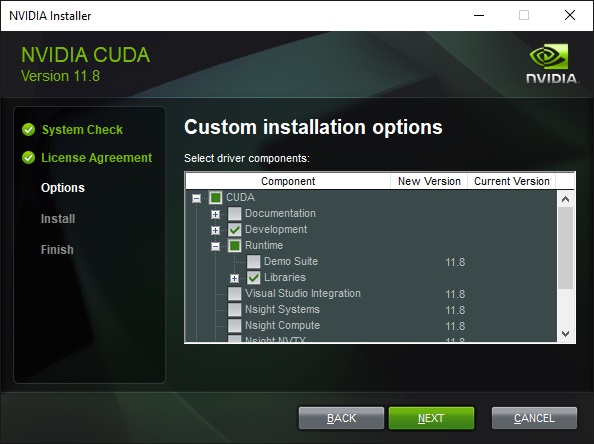
And from that page, if you have a 30xx or 40xx GPU, deselect everything but the "Cuda/Runtime/Libraries". If you have any other Nvidia GPU, you will also have to select the "Development" component. |
|
|
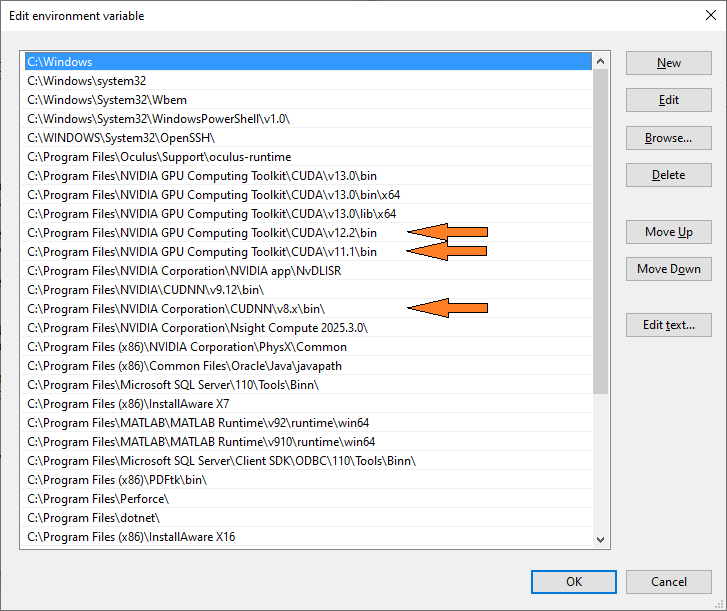
The required DLLs should now be present in the "C:\Program Files\NVIDIA GPU Computing Toolkit\CUDA\v11.8\bin" directory. You will now need to place that directory in the system "Path" variable. See the "Path variable" section of this web page. |
Installing cuDNN 8 library
|
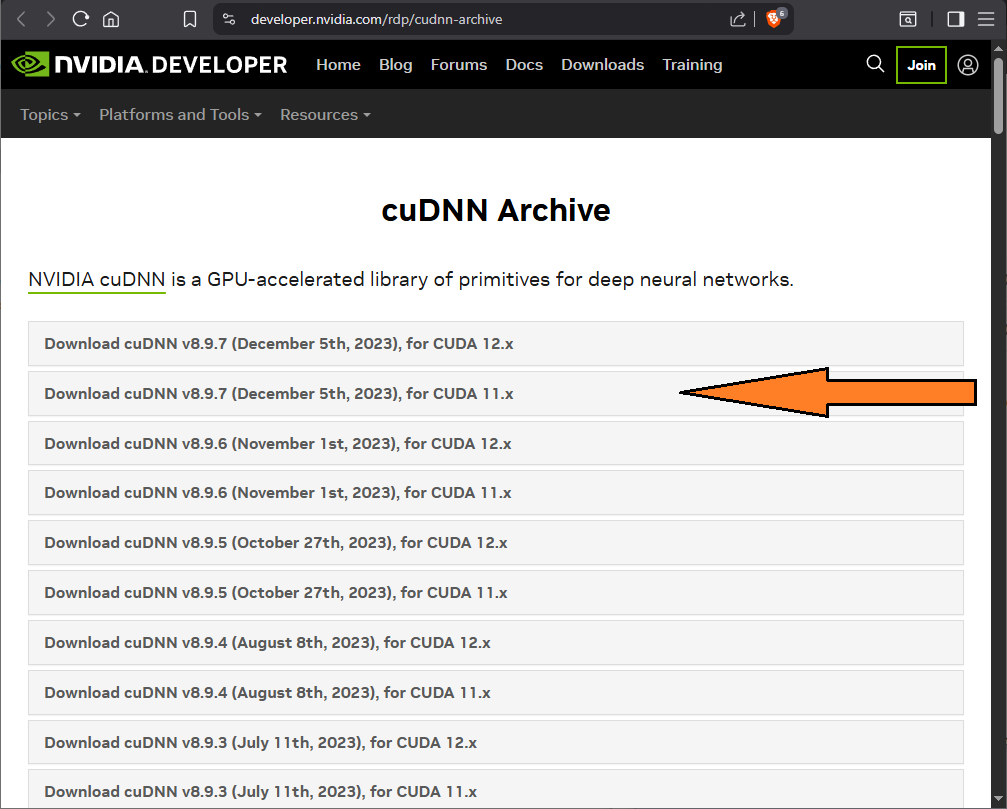
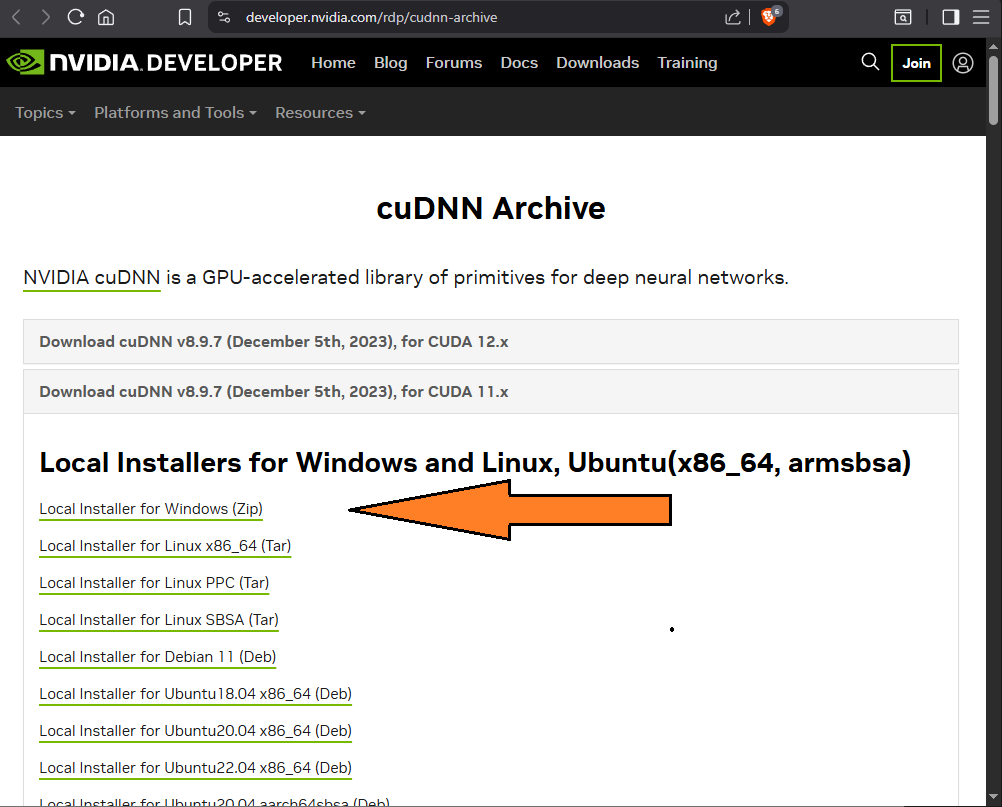
You also need to install the cuDNN libraries. Here any version of cuDNN 8 will work. So I suggest the latest, cuDNN v8.9.7
for CUDA 11 (you can find it here:
https://developer.nvidia.com/rdp/cudnn-archive.
) The cuDNN package is a "Zip" file. You need to "un-zip" it to the directory "C:\Program Files\NVIDIA Corporation\CUDNN\V8.x".) |
|
|
Next you need to specify that you want the Windos version. |
|
|
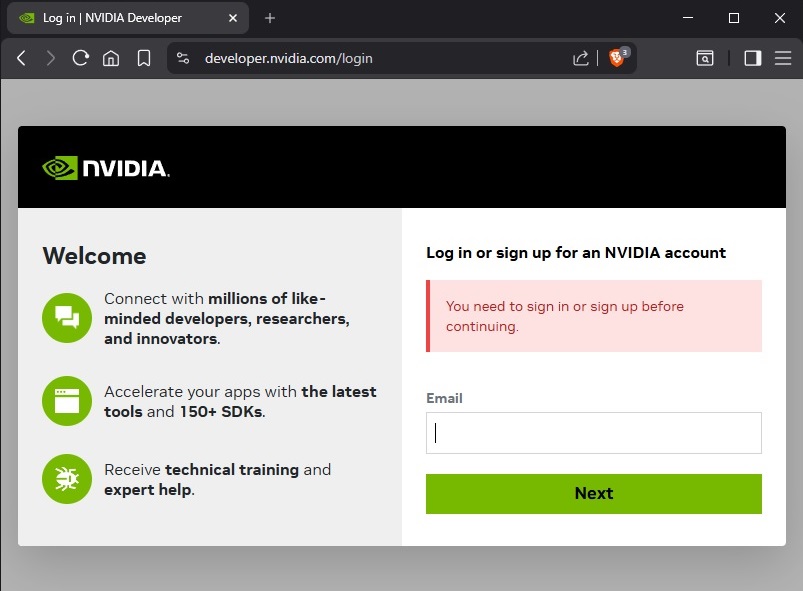
At this point, Nvidia will ask you for a developer's account. If you do not have one, create it here. |
|
|
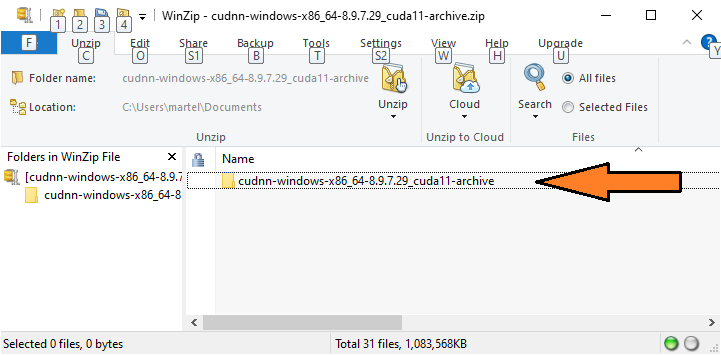
After this, the package is downloaded to your "Downloads" directory. The cuDNN package is a "Zip" file. You need to "un-zip" it to the directory "C:\Program Files\NVIDIA Corporation\CUDNN\V8.x".) Just double click on the downloaded file (Downloads\cudnn-windows-x86_64-8.9.7.29_cuda11-archive.zip). This will open the zip file. Then double click on the "cudnn-windows-x86_64-8.9.7.29_cuda11-archive" folder to open it inside the Zip program. |
|
|
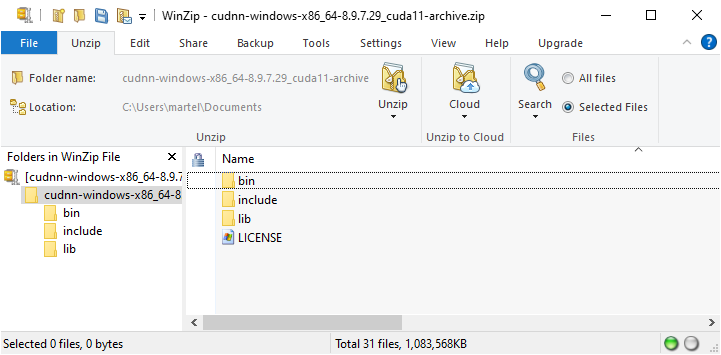
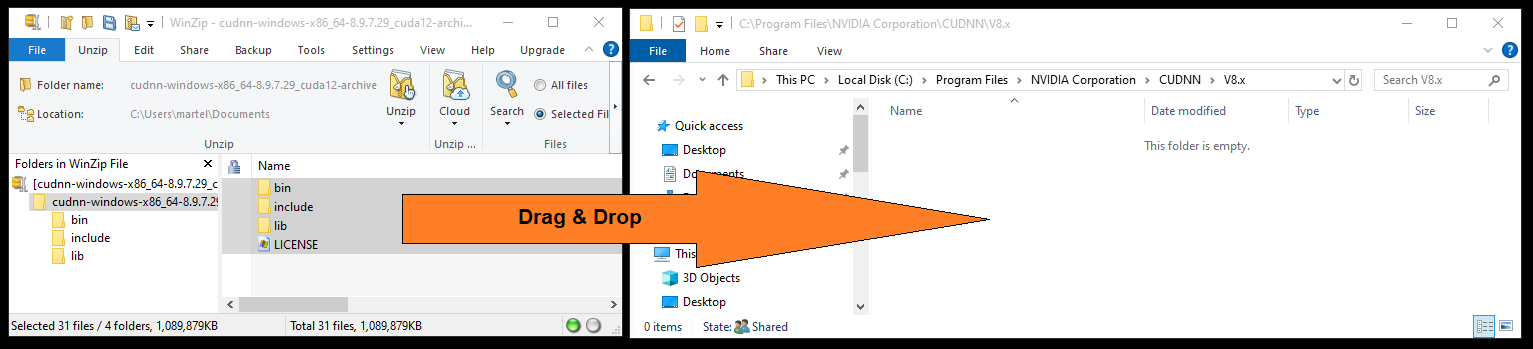
You now see the 3 sub-directories "bin", "include" and "lib". |
|
|
You now need to create the directory: "C:\Program Files\NVIDIA Corporation\CUDNN\V8.x" directory. Create it and open that directory. Now select the 3 sub folders ("bin", "include" and "lib") in the zip program and drag them over to the "C:\Program Files\NVIDIA Corporation\CUDNN\V8.x" directory. |
|
|
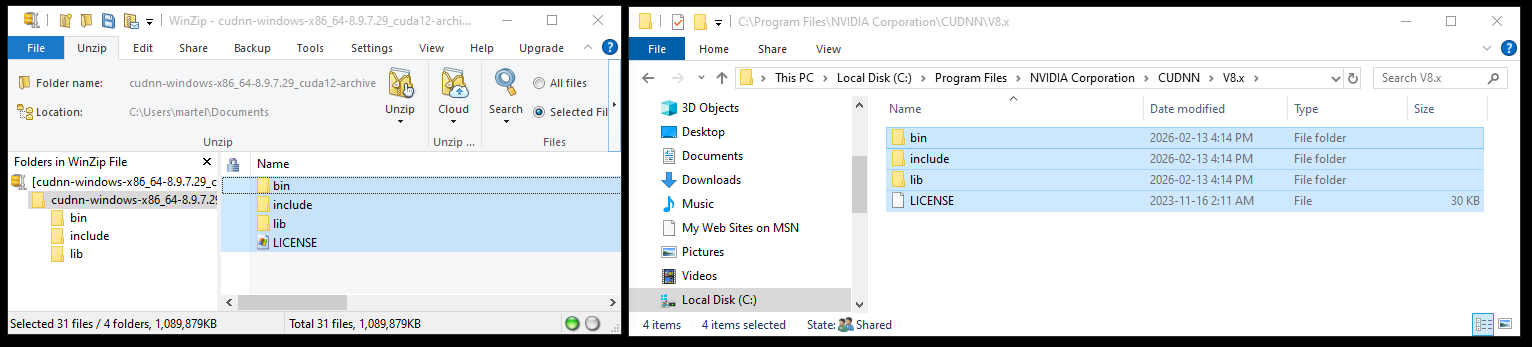
The selected directory will be unzipped in the target directory. |
|
|
The only thing left to do is to let the AI know where you placed the cuDNN library. For this we will add the directory "C:\Program Files\NVIDIA Corporation\CUDNN\V8.x\bin" to the Windows "Path" variable. |
Installing CUDA for newer generations of GPU
|
If you have a newer generation of GPU (50xx), things get a little more complicated... When it start, the AI, look for "cudart64_110.dll" (that's in' CUDA 11) and "cudnn64_8.dll" (that's in cuDNN 8). If it does not find these two, it will disable CUDA acceleration. So, you still need to install the CUDA V11 and cuDNN 8 (for that you need to follow the previous instructions). But that is not enough! When you start the AI, you will get the message: 426608: W tensorflow/core/common_runtime/gpu/gpu_device.cc:2027] TensorFlow was not built with CUDA kernel binaries compatible with compute capability 12.0. CUDA kernels will be jit-compiled from PTX, which could take 30 minutes or longer. So, it will recompile part of the tensorflow libraries to be compatible with CUDA 12. For this, you need to have CUDA 12 installed on your system and accessible by the "PATH" variable! (See next section for the CUDA 12 installation.) But that's not all! When the AI look for the cuDNN librarie, it will need to have access to the "zlibwapi.dll". Unfortunately, that DLL is not there and if you don't have it you get the message: 327923: I tensorflow/stream_executor/cuda/cuda_dnn.cc:384] Loaded cuDNN version 8903 Could not locate zlibwapi.dll. Please make sure it is in your library path! Actually that DLL is only present in some versions of the Toolkit (and not in the versions I made you install). So, to make things simpler, I placed a copy of that DLL on my web site. You can get it here: zlibwapi.zip You need to copy this DLL in the "C:\Program Files\NVIDIA Corporation\CUDNN\V8.x\bin" directory. Once all this is done, The first time the AI run, it take a looooong time (it does recompile part of the tensorflow library). But after that it is much faster. |
Installing CUDA Toolkit 12
|
Installing the CUDA toolkit V12 is similar to V11. Just select "CUDA Toolkit 12.9.1" from the list.
(you can find it here:
https://developer.nvidia.com/cuda-toolkit-archive.
) |
|
|
Again note that you only need the runtime libraries for AI to work. So in the installation, select the "Custom (Advanced)" installation option and from that page, deselect everything but the "Cuda/Runtime/Libraries". |
|
|
The required DLLs should now be present in the "C:\Program Files\NVIDIA GPU Computing Toolkit\CUDA\v12.9\bin" directory. You will now need to place that directory in the system "Path" variable. See the "Path variable" section of this web page. |
Adding a directory to the Windows "Path" variable
|
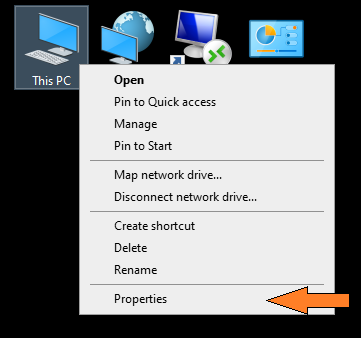
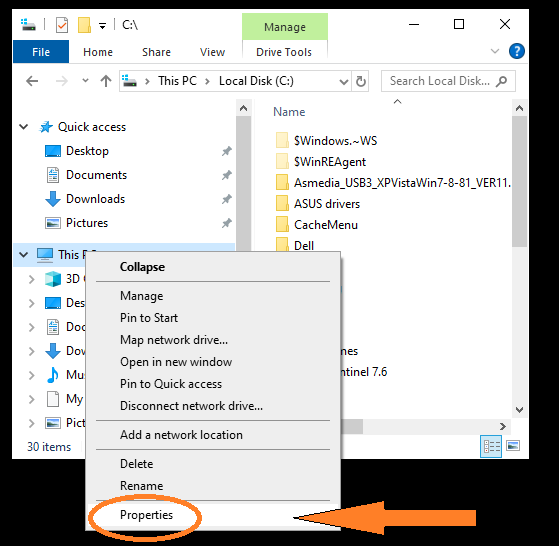
You need to add a few directories to the Windows "Path" variable. Here's how: Right click on the "This PC" icon, either on the desktop or from a directory browser. |
||
|
|
|
|
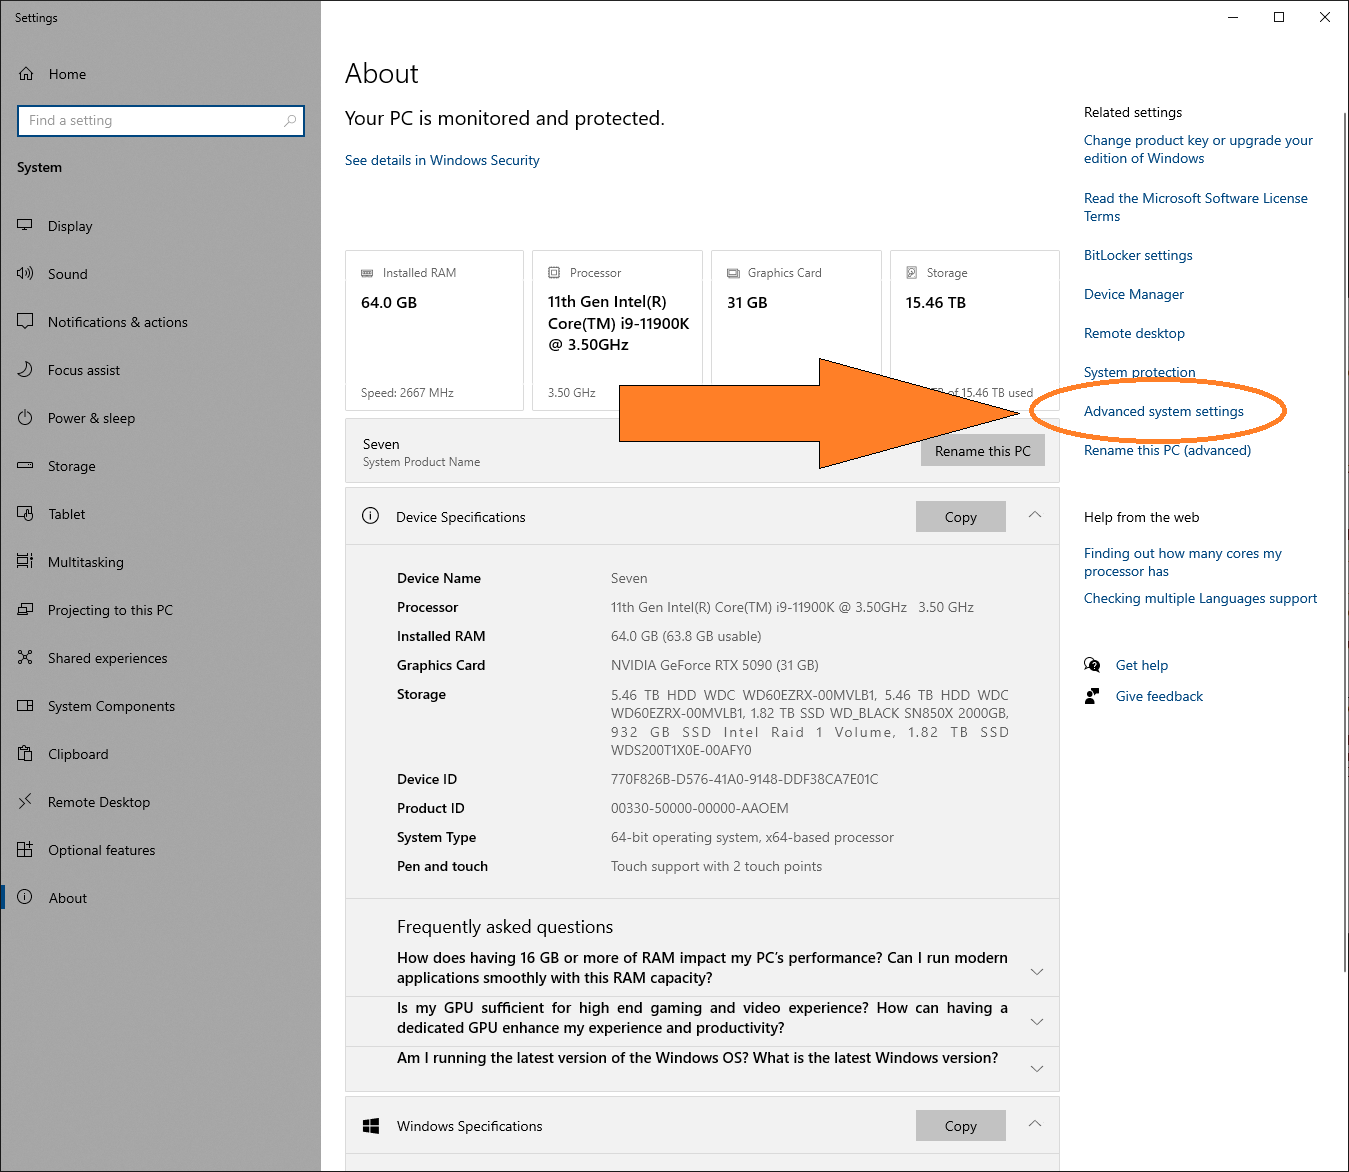
From the new page, on the right hand column, select "Advanced system settings". |
||
|
||
|
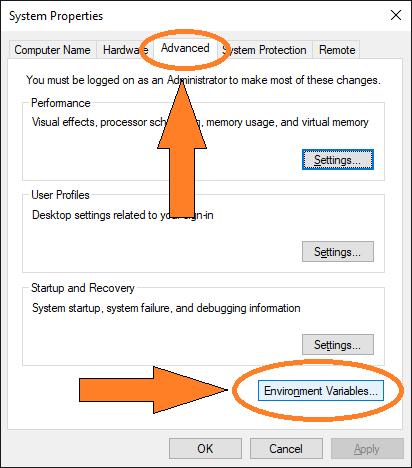
From the new "System Properties" page, select the "Advance" tab and click "Environment Variables". |
||
|
||
|
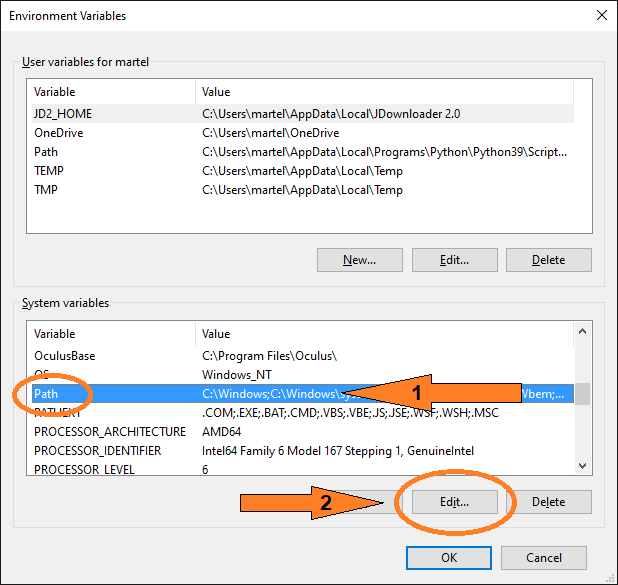
From the new "Environment Variables" page, in the "System variables" section, select "Path" and then click on "Edit...". |
||
|
||
|
You are now in the "Path" editor. Use the "new" button to add a line and the "edit" button to edit it. Your "Path" variable should have lines for the CUDA toolkit 11, possibly 12 and for the cuDNN 8. |
||
|