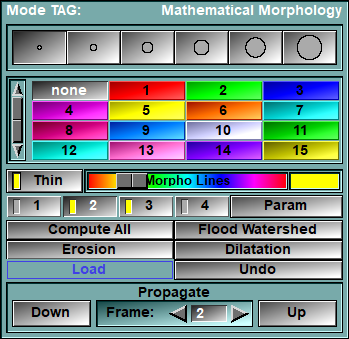
In this mode you can use Mathematical Morphology to segment and edit the TAG images
Mathematical Morphology segmentation is done by computing the Watershed of the gradient of the image. This will give you a kind of mosaic of the image. Each region of this mosaic can then be filled with the appropriate Tag value. Each region should correspond to no more than one tissue type, filling these regions will be faster than editing the image one pixel at a time.
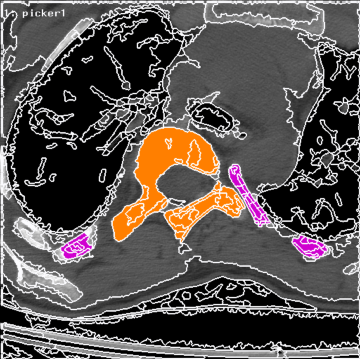
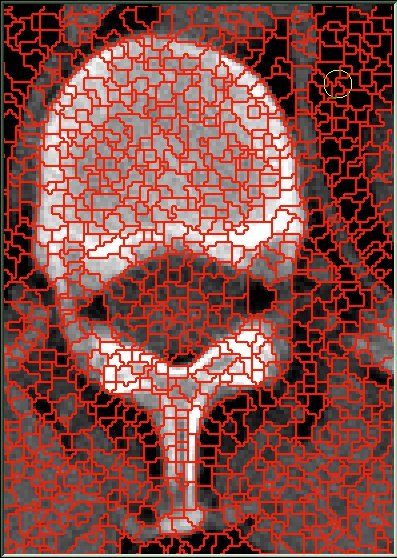
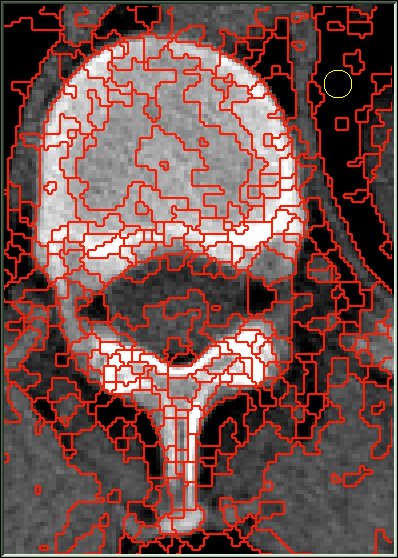
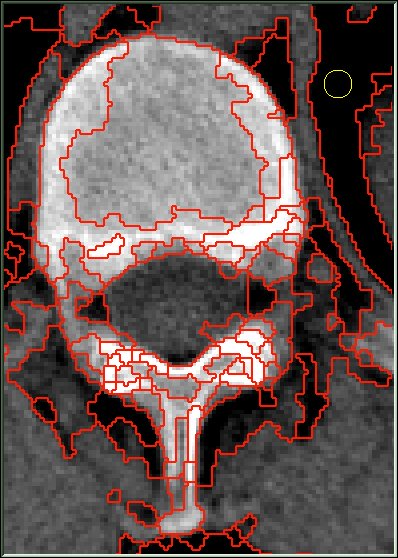
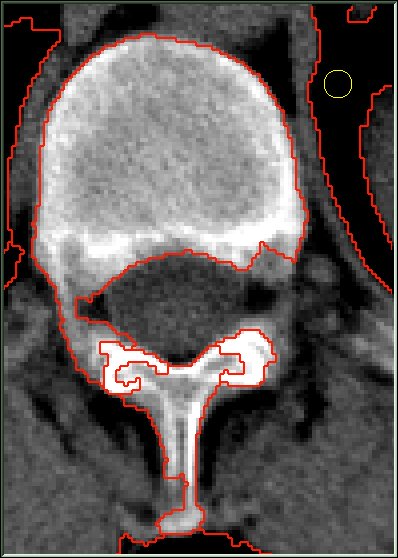
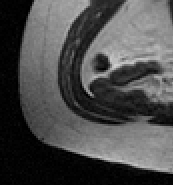
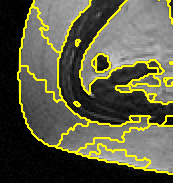
Computing the Watershed yields a great number of regions; we then proceed to merge these regions together. SliceOmatic enables you to compute four (4) different merges. The images below show the effect of the four defaults merges.
|
|
|
|
|
|
|
|
Merge 1 |
Merge 2 |
Merge 3 |
Merge 4 |
The first step to perform is the computation of the Watershed for a GLI image. This can be done by pressing one of the 4 Merge buttons, or the Compute All button. Once this is done, the Water Parting mesh will be superimposed on the image. The Water Parting is the set of lines that define the different Watersheds. The color and thickness of these lines can be modified with the Hue slider and the Line Thickness button (see below). You can then Flood-Fill the Watershed with a first approximation of the segmentation obtained through a threshold (you may want to do one or two erosions of the threshold image before doing the flood-fill). This step will fill every pixel of the TAG Image corresponding to a region of the watershed with the highest Tag value of these pixels.
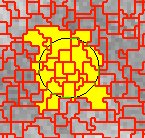 You can then fill individual watershed regions with the mouse. The editing of the TAG image in the Morpho mode is similar to the Edit mode. You use the left mouse button to add the current Tag value, and the right mouse button to bring back the Tag value from the save buffer. The difference is that instead of modifying only the pixels under the brush, you change the Tag value of all the pixels in the regions touched by the brush.
Pressing the middle mouse button will increase the brush to a big square, allowing you to paint or erase a block at a time.
The first modification you do to an image will automatically load the image in a "save" buffer which is used when you "erase".
From the Graphic Interface
|
|
|
|
Select the brush used to paint in the Display Area. This tool is also described in the "Interface tools" section of the introduction
|
|
|
Select the current Tag value. This tool is also described in the "Interface tools" section of the introduction
|
|
|
Change the Water parting lines’ thickness. This button will sequentially take the values “Off”, “Thin” and “Thick”. The keys “a”, “s” and “d” can also be used as shortcuts for these settings.
|
|
|
Hue slider |
Change the Water parting lines’ color to make them more visible. An example of the current color is showed in the box at the right of the slider.
|
|
SliceOmatic enables you to compute 4 different merges. The merging of regions is controlled by 2 parameters: the surface of each region (the program will attempt to merge regions with a surface smaller than the threshold value) and the difference between regions’ mean values (the program will merge regions together only if this difference is smaller than the threshold value). By default, the 4 Merge buttons are assigned increasing merge parameter values. These values can be modified with the Param button. These 4 buttons are used to select the associated Watershed merge. If this merge has not yet been computed or if the parameters of this Merge button have been changed, the Watershed merge is computed.These buttons can also be activated with the keys “q” , “w”, “e” and “r” for 1 to 4 respectively. Depending on the Display Mode selected, the program will compute the Watershed of the current image (Display Mode One), or of all the selected images (Display Mode All). The yellow indicator on each of the merge buttons indicates if this merge exists for the current image.
|
|
|
Display a new area in the menu (see below). These new buttons enable you to modify the merge parameters (surface and mean difference) associated with the 4 merge buttons. Surface is expressed in pixels and the mean difference is expressed in % of the image’s dynamic range.
SliceOmatic will attempt to merge with its neighbour all Watershed regions smaller than “surface”. The merge will be done if the difference between the mean value of the pixels in the 2 regions is smaller than the “mean diff.” value.
|
|
|
Compute the Watershed of all the selected GLI image(s) for all their merge values.
|
|
|
The highest Tag value inside each region of the Watershed is used to fill the region. This function is usually used in conjunction with the Threshold segmentation as a first step in the Morphological segmentation: compute a segmentation with the Thresholds, then flood the regions with these results.
|
|
|
Shrink the TAG image one pixel in all directions.
|
|
|
Dilatation |
Expand the TAG image one pixel in all directions.
|
|
Manually load the image in the restore buffer. See Undo/Redo in the Main Menu section for more information on the Load and Erase functions
|
|
|
Undo last brush stroke. It is a shortcut to the “Undo” button of the Uno/Redo Menu. It can only undo “Morpho” operations.
|
|
|
Use the segmentation of the image selected by “slice” as a seed for the segmentation of an adjacent image. The propagation can be done either on the image immediately preceding (“Up” button) or following (“Down” button) the selected image. This tool is also described in the "Interface tools" section of the introduction |
From the Display Area
The mouse controls associated with this mode are:
|
|
|
|
|
|
Mouse button |
Function |
|
|
|
|
|
|
Left |
Flood all the regions under the cursor. |
|
|
Right |
Restore the “erase” color in all the regions under the cursor. |
|
|
Middle |
Increase the brush to a big square, allowing to paint or erase a block at a time. |
From the Keyboard
In addition to the keyboard shortcuts seen in section 5.2.0.3, the following keyboard keys , Specific to Morpho, can also be used as a shortcut:
|
|
|
|
|
|
Key map |
Action |
|
|
|
|
|
|
“q”, “w”, “e”, “r” |
Select Merge 1 to 4 |
|
|
“a”,“s”, “d” |
Set the Water parting lines visibility and thickness |
From the Command Line
System Variables defined in this module:
|
|
$MORPHO_MERGE_MAX |
(U16,R) |
Maximum number of "Merge" buttons. |
|
|
$MORPHO_MERGE_NB |
(U16) |
Actual number of "Merge" buttons. |
|
|
$MORPHO_MERGE_LIST |
(A,U16) |
List of the merge parameters (1, ..., n) |
|
|
$MORPHO_MERGE_CUR |
(U16) |
Current "Merge" value. |
|
|
$MORPHO_PARAM_DIST |
(A,F32) |
Array of "Distance" parameters for the merges. |
|
|
$MORPHO_PARAM_SURF |
(A,F32) |
Array of "Surface" parameters for the merges. |
|
|
$MORPHO_LINE_MODE |
(U8) |
Display mode for the watershed lines (0=off, 1=small, 2=thick). |
|
|
$MORPHO_LINE_COLOR |
(C) |
Color of the watershed lines. |
Text commands recognized in this module:
Morpho: Line (off|small|thick)
Assign a value to the variable $MORPHO_LINE_MODE that control the appearance of the watershed lines.
Morpho: Color R G B
Assign a value to the variable $MORPHO_LINE_COLOR that control the color of the watershed lines.
Morpho: Param t_merge surf diff
Assign values to all the elements of $MORPHO_PARAM_SURF and $MORPHO_PARAM_DIST that match the template "t_merge". These variables control the merge of the watersheds.
Morpho: [t_frame] Compute t_merge
Compute the merge of the watersheds for all merge matching the template "t_merge" for all the frames matching the template "t_frame"
Morpho: [t_frame] Close size
Morpho: [t_frame] Dilatation
Morpho: [t_frame] Erosion
Morpho: [t_frame] Open size
Perform Erosion, Dilatation, Open or Close Mathematical Morphology operation on all the frames matching the template "t_frame". The Open and Close operation also have a "size" parameter that control the reach of the operation
Morpho: Propagate [up|down]
Propagate the result from the current frame to the next frame in the group, either up (the default) or down.
|
|
|
Technical Note:
|
|
|
