This group will have the buttons to access the interface of the 3D classes that do have an interface. By default, none of the active clases have an interface and this menu group is not available.
Activating 3D classes is done through the "Class Management (3D)" mode. Please note that only some of the classes have an interface (such as Matrix). Other classes (Group) do not have an interface. Only classes with an interface will have a button in this menu group when they are activated.
 The same class can be activate more than once (for example, you can assign transformation matrices to different objects)
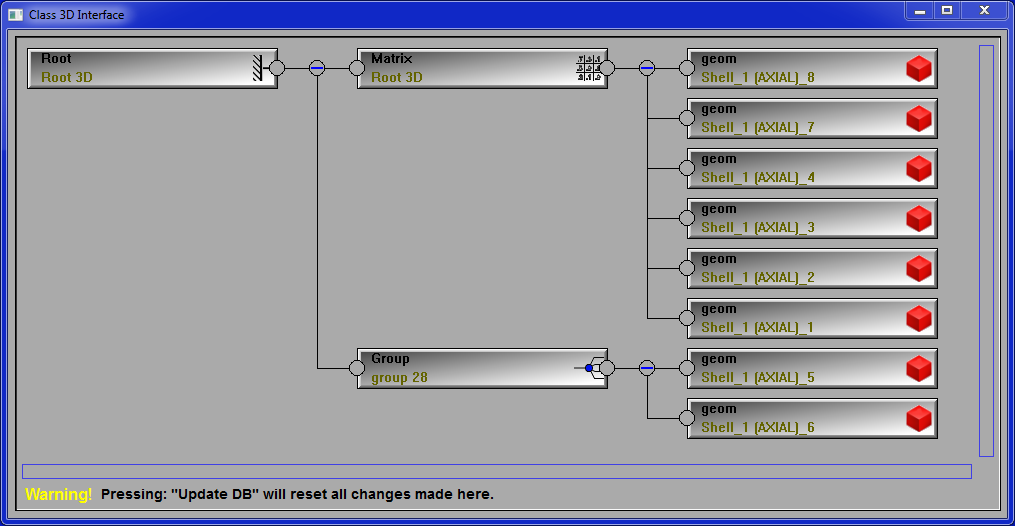
The 3D tree starts at the "Root" node, and finishes with "Geom" nodes. Each 3D geometry file (STL, OBJ...) that you read in sliceOmatic contains one or, sometimes, multiple geometries. Each of these is a "Geom". The root and the geom are both a "class" of nodes.
The root and the geom are always present in the 3D database tree. But in between, you can add other classes.
Note:
|
|
|
The "Matrix" classes are used to selectively transform some (but not all) the geometries. The "Group" class can be used to make logical groups of multiple geometries.
|
|
|
|
|
Manual edition of the "Group" and "Matrix" classes in the "DB Class Management 3D" mode. |
The classes that can have an interface buttons are:

Specify the 3D transformation matrix. From the "Class Management (3D)" you can assign these matrices to different objects or groups of objects.
The classes that do not have an interface buttons are:
This class can be used to create logical group of geometries.
Note:
|
|
|
