There are 5 different file types you will encounter in this manual: the CSV files, the GLI files, the TAG files, the GEOM files and the Script files.
The CSV Files
CSV stands for Coma Separated Values. It is a common name used for database files where data cell are separated by a single character (usually a comma). The data is organized in rows, with a "CR" (Carriage Return) terminating each rows. All Excel compatible files exported by sliceOmatic will be in that format. The usual extension is ".csv". But since CSV files are simple text files, we sometime also encounter them with the ".txt" extension.
If you read CSV files in sliceOmatic, they will be considered 1D files. Each row being a separate class (Data) and containing a fixed number of data cells (Hence the 1D).
The GLI Files
GLI stands for Grey Level Image. It is a generic term used to describe the input images you read in sliceOmatic. The pixel values of these images represent the physical properties of the scanned tissue (CT number, photon emission...) expressed in a numerical form by an 8, 16 or even 32 bit integer. They have a range of values that is usually in the thousands (potentially from -32,768 to 32,767 for a 16 bit image). These images will be displayed in shades of grey, hence the term Grey Level Image or GLI.
Note:
|
|
|
This program can work with any type of images (CT, MRI, US, SPECT, PET...). But since there are a variety of file formats, some image formats may not be recognized by sliceOmatic.
Presently, sliceOmatic is able to read the following standard formats:
DICOM, NEMA-1, NEMA-2, TIFF, JPEG, Interfile 3.0.
Also, sliceOmatic is able to read a number of proprietary file formats. A detailed list is available at: http://www.tomovision.com/products/format_image.htm
The TAG Files
The program will help you create a new set of images called TAG images. There will be one TAG image for each GLI image. They contains pixels whose values can range from 0 to 255. These values are tags that are used to identify the anatomical structures of the corresponding pixel in the GLI images. (ex: all pixels whose tag is 1 are bone, 2 are fat, 3 are muscle ... Or, 1 are kidney, 2 are liver, 3 are bone...).
The program will display these TAG images as color images superimposed on the GLI images. Depending on the color scheme selected:
•only the TAG images will be displayed
•only the GLI images will be displayed
•the TAG images will be opaque and displayed over the GLI images
•the TAG images will be translucent and displayed over the GLI images.
These new TAG images can be saved in files. The created files will have the same name as the corresponding GLI file but with a ".tag" extension. Optionally, a suffix can be appended at the end of the file. This can be useful if you want multiple users to segment the same GLI images. Each user can have his own suffix and thus have different TAG files while sharing the same GLI files.
The default format (TomoVision) of these files is given in Appendix B: The TAG File Format. Optionally, from the Config menu, you can chose to use DICOM (.seg) or NIfTI (.nii) file format for the TAG files.
These files will be placed either with the GLI images or in a different directory (see the TAG section of The Configuration Menu).
When sliceOmatic loads a GLI file, it will automatically search for an associated TAG file and load it if present. Do not attempt to load a TAG file directly, this will only confuse sliceOmatic.
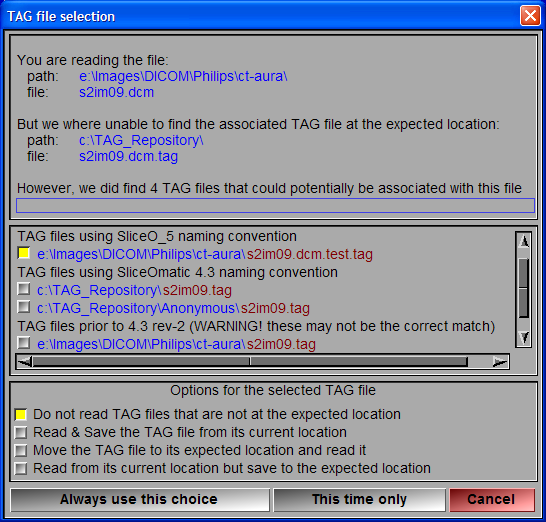
When loading the GLI file the program looks for the associated TAG file in the directory specified in the preferences (by default, the same dir as the GLI file) using the name syntax specified in the preferences. If the program does not find the associated TAG file, it will look in other directories using other syntax. If it does find a TAG file that matches the GLI file, it will pop a window with a warning message and ask for directions.

The Multi TAG Files
With the introduction of the Multi TAG tools (sliceO-6 rev-6), you can now haveup to 4 TAG buffers for each image in sliceOmatic.
The TAG files associated with the 3 new buffers will have extensions ".tbg", "tcg" and ".tdg".
The Geom Files
The 3D module of sliceOmatic is used to create and manipulate 3D polygonal surfaces. These surfaces can be exported in a number of 3D formats: STL, MOVIE.BYU, DXF, OBJ and VRML. Files in STL or MOVIE.BYU format can also be imported in the program.
The Script Files
Reading, sorting and changing the orientation of all the slices of a data set can be a long task. SliceOmatic can help you automate this task by generating a script file. SliceOmatic can generate for you a script file that contains all the information necessary to reread all the files currently in sliceOmatic. Alternatively, you can write your own scripts and use them to read and manipulate your data sets. The syntax of these files is given in Appendix A: The Command line Syntax.