By default, Only one TAG buffer is used and displayed. The Values for this buffer are read and saved from ".tag" files. However, with the "Multi TAG" tools, you have access to 4 TAG buffers. All sliceOmatic segmentation operations can be done in any of these 4 buffers.
You can also use this tool to compare the different TAGs in the different buffers.
From the Graphic Interface
|
|
|
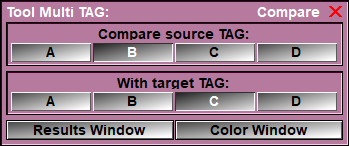
Source |
Select one of the 4 TAG buffers. This will be the "source" buffer used in the comparison.
|
Target |
Select one of the 4 TAG buffers. This will be the "target" buffer used in the comparison.
|
Results window |
Open a "Resuls" window that display the comaprixon numerical results.
|
Color window |
Open a "Colors" window that enable to control the colors used to display the differences between both buffers. |
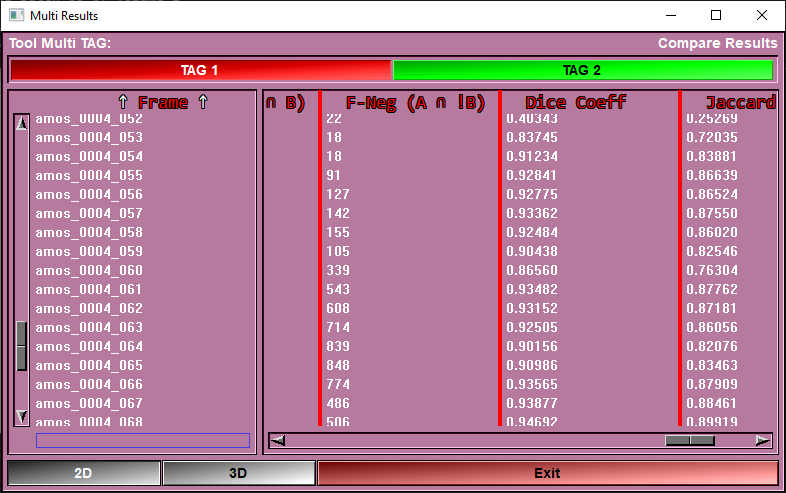
The Results window
This window will display the numerical results computed when comparing the TAG values of the source buffer with the target buffer.
All these values can also be selected from the "Result (2D)" tool's interface for export in an excel compatible file.
|
|
|
|
TAG selection |
The numerical values are computed for each TAG individually. You can select the TAG you want to have the results for. The list is limited to the TAG values present in the source and target buffers.
|
|
Frame window |
Display the name of the frames currently selected and used in the computation.
Clicking on the title ("Frame") will sort the frames according to their position in sliceOmatic (usually increasing "z", or, feet to head).
Clicking on a frame's name will make that the current frame in sliceOmatic.
|
|
Results Window |
Display the numerical results of the differences between the source TAG buffer (A) and the target TAG buffer(B). The displayed values are: •Number of tagged pixels in A: A •Number of tagged pixels in B: B •Intersection (Int) also know as "True Positive (T-Pos)", computed as: A ⋂ B •Sum, computed as: A + B •Union, computed as: A ∪ B •False Positive (F-Pos), computed as: (!A ⋂ B) •False Negative (F-Neg), computed as: (A ⋂ !B) •Dice Coefficient, computed as: 2*Int / Sum •Jaccard Index, computed as: Int / Union •Accuracy, computed as (T-Pos + T-Neg) / (T-Pos + T-Neg+ F-Pos + F-Neg) •Precision, computed as T-Pos / (T-Pos + F-Pos) •True Positive Rate (TPR), computed as T-Pos / (T-Pos + F-Neg) •False Positive Rate (FPR), computed as F-Pos / (F-Pos + T-Neg)
Clicking on a column title will sort the frames according to either increasing values of this column results (first click) or decreasing values (second click).
Clicking on a value will make that matching frame the current frame in sliceOmatic.
Note:
|
|
2D / 3D |
If the selected groups in sliceO are 3D volumes, you will also have the option of seing results for the complete volumes. these values can also be selected from the "Result (3D)" tool's interface for export in an excel compatible file.
|
|
Exit |
Close this window |
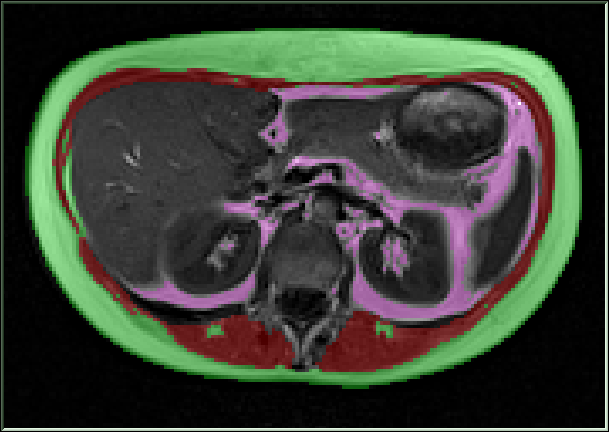
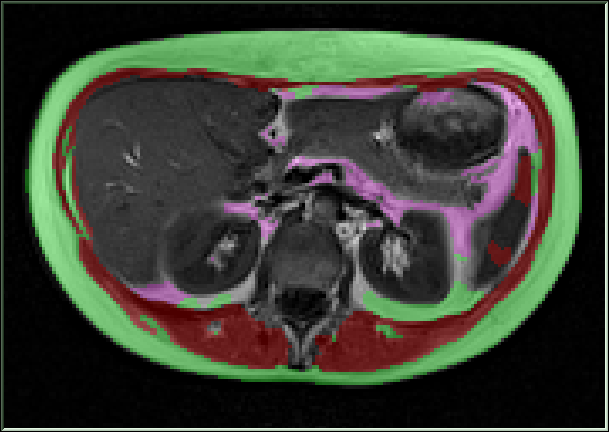
The Colors window
This window enable you to control the display of the similarities and differences of teh TAG values betwen the source and target buffers.
|
|
|
|
|
|
|
|
Source TAG colors |
Target TAG colors |
Mix of both TAG colors |
Highlight of the differences |
|
|
|
Buffer selection |
Select one which of the TAG buffers to display. The choices are: •Source: display only the TAGs from the source buffer •Target: Display only the TAGs from the target buffer •Both: Display a mix of both buffers.
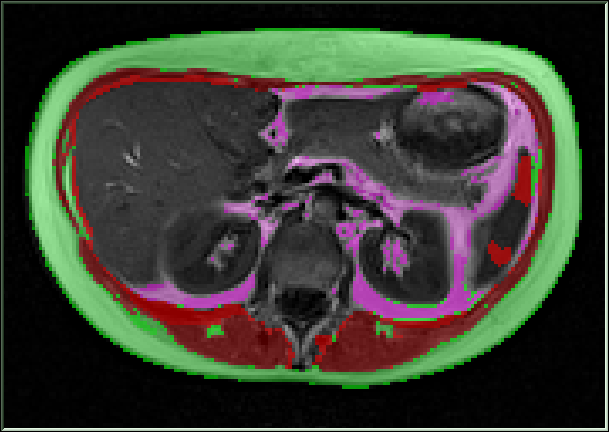
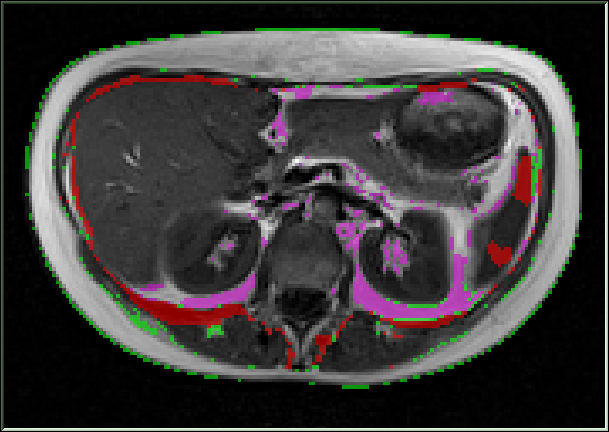
Depending on the Color Scheme, the intensity of the TAG color will be different when both source and target are identical (Match=True Positive), or if they are different (False Pos. or Neg.). •For Grey: Only the False Pos. and Neg. are displayed. •For Mixed and Tint: The opacity of the False Pos. and Neg. is higher than the opacity of the Match pixels. •For Over and TAG: all intensities are similar.
|
Color Scheme |
Select the current color scheme used to display the images in sliceOmatic. This is similar to the "Color Scheme" tool.
|
TAG list |
For each TAG present in either source or target, you can control the color used to display pixels that are present in both buffers (Match), or in just one of the buffers (False Neg. if the TAG is only present in the source pixels, False Pos. if the TAG is only present in the target pixels).
|
Exit |
Close this window |

From the Display Area
There is no Display Area interaction specific to this tool.
From the Keyboard
The following commands can also be mapped to keyboard keys as a shortcut:
|
|
|
|
|
|
Key map |
Action |
|
|
|
|
|
|
F1 |
Set the color scheme mode for all windows: F1=Grey, F2=Mixed, F3=Tint and F4=Over |
|
|
F2 |
|
|
|
F3 |
|
|
|
F4 |
|
|
|
"SHIFT_MINUS" & "SHIFT_PAD_MINUS |
Decrease / increase the “mix” and tint density by .1 (from: 0.1 to 0.9) |
|
|
"SHIFT_PLUS" & SHIFT_PAD_PLUS
|
From the Command Line
There is no command line or variables associated with this tool.