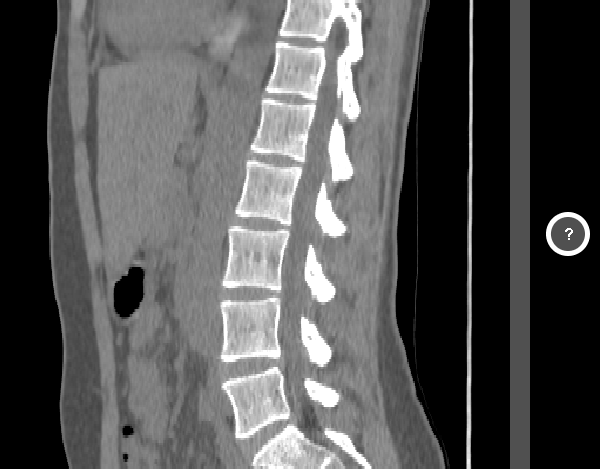
This tool enable will open a new window on the left of the current axial view. This window will display a side view of your volume.

You can also used this tool, in association with either the "2D Label" tool to assign labels to all the axial frames in your volumes.
In the "Slice" and "Volume" modes, selected slices are in white and un-selected slices will have a blue tint.
Note:
|
|
|
From the Graphic Interface
|
|
|
|||||||
|
You can rotate the view in the "Side View" window using this slider. The view csn rotate 360 degres. You can go from sagital (completely to the left) to coronal (90deg) and more.
|
||||||||
|
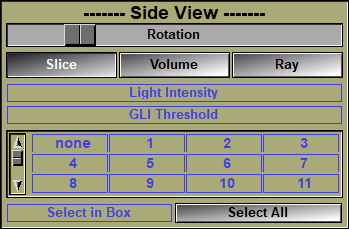
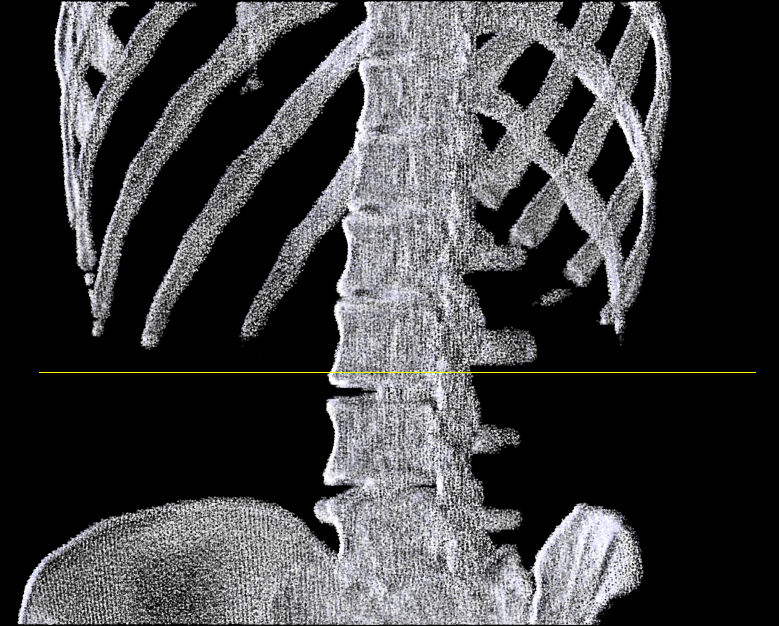
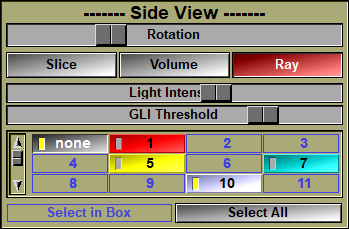
Depending on the selected button, the Side View window will either show a cut plane going through the volume (Slice), a 3D volume visualisation using point cloud (Volume), or a ray traced view of the volume (Ray). In these 3 modes, you can rotate the view aroun the "z" axis using the "Rotation" slider.
Note:
|
||||||||
|
Light Intensity |
For the Volume and Ray options, you can change the intensity of the light sources.
Note:
|
|||||||
|
GLI Threshold / TAG transparency |
|
|||||||
|
TAG selection |
|
|||||||
|
Slice selection |
You can use the selection box in the side view window to select specific slices from the volume. The "Slice" and "Volume" display modes will show unselected slices in a blue tint.Select in Box will mark all the slices inside the red selection box in the side view window as the selected slices. Any operation that affect multiple slices will only operate on the selected slices.Select All will mark all the slices loaded in sliceOmatic as selected.
|


From the Display Area
|
|
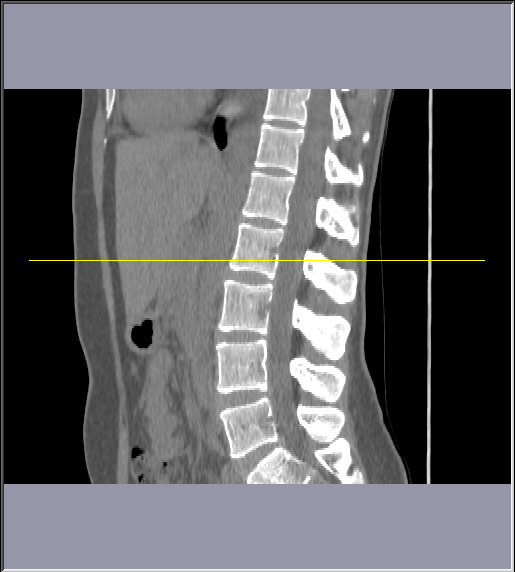
In the Side View window:
In the side view window, you can use the mouse to create and drag a "selection" box. This box can be used to select the slice inside the box ("Select in Box" button) or to label the slices inside the box with the 2D "Slice Label" tool.
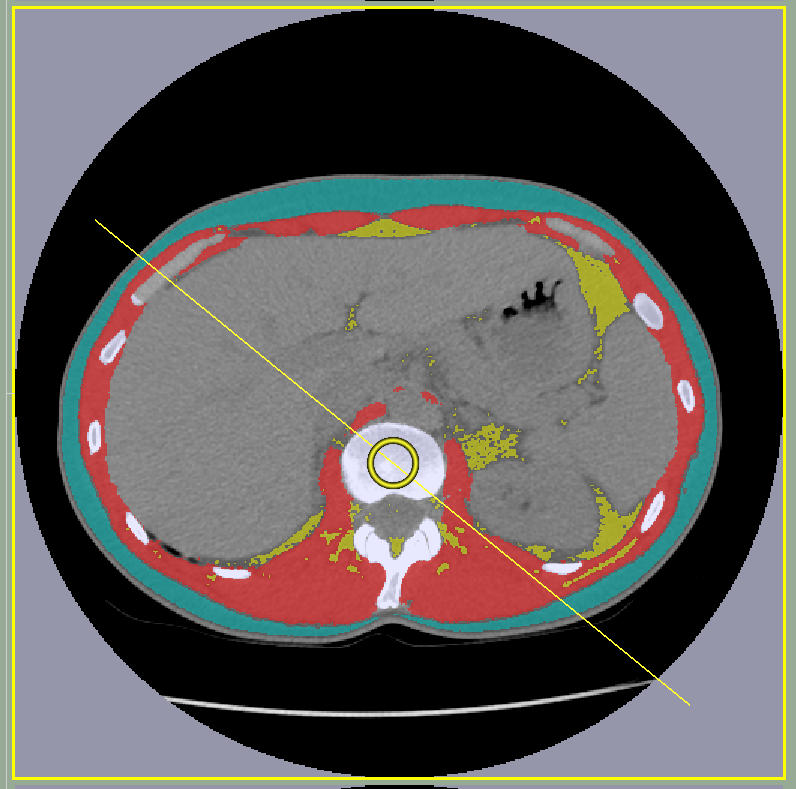
The position of the current frame will also be displayed as a yellow horizontal line crossing the side view window. You can change the current frame by pressing the "." (period) key on the keyboard while the cursor is over the side view window or simply by doing a double click on the desired location..
|
|
||
|
|
In the axial window:
In the axial view, the current frame will display the rotation center and rotation plane. You can change the rotation center by dragging it with the mouse. The angle of the rotation plane can only be changed with the "Rotation" slider.
Note:
|
|

Working with the "Slice Label" tool:
|
|
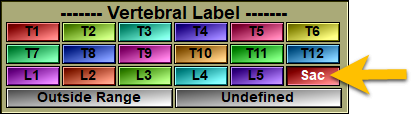
If you open the "Slice Label" tool, then a vertical "vertebral color" line and the associated vertebral labels will be displayed on the right hand side of the "side View" window.
The interaction between the "Side View" window and the "Slice Label" tool will enable to assign vertebral labels to all the slices in your volume. |
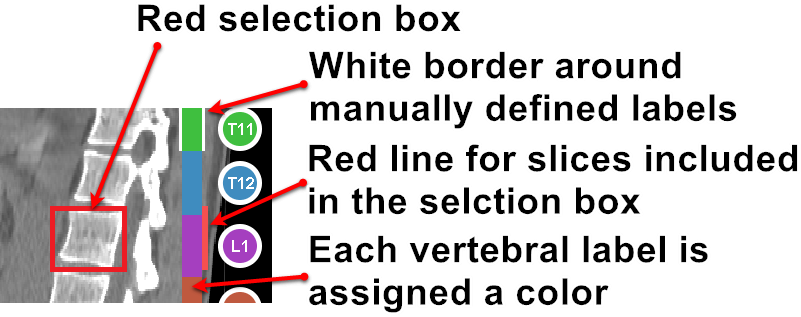
When you create a selection box in the "Side View" window, you will also see a red line at the right of the "vertebral color" line. This red line cover all the slices that have been touched in the selection box. All the slices marked by this red line will be affected if you select a label in the "Slice Label" tool.
Once you assign a vertebral label to a group of slices, the "color" line for these slices will take the color of that specif label. And, if there is enough room, the label will be displayed inside a circle.
Labels that have been assigned manually will also have a white border. Labels that have been interpolated by the computer will not have this border.
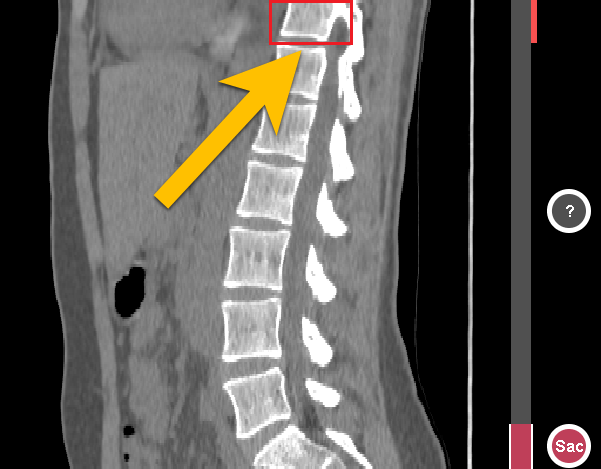
Here's how you can assign labels to all the slices in a 3D dataset using "Side View" and the "Slice Label" tool:
|
|
When you start, all the slices are marked as "Undefined" |
|
|
|
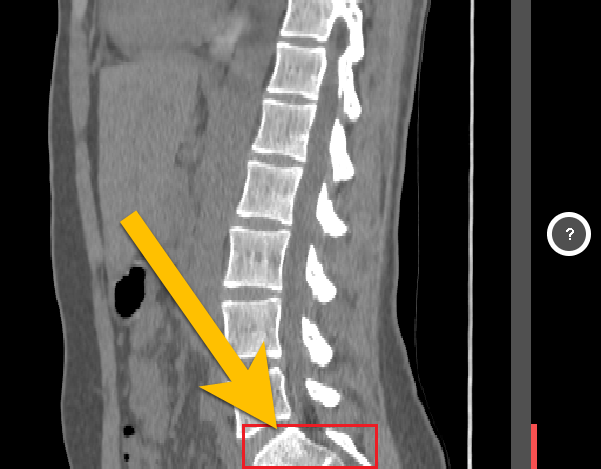
You click and drag a box around the first vertebra of the volume. |
|
|
|
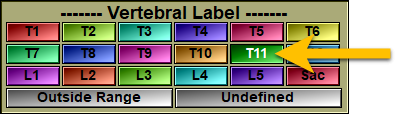
You then assign a label to all the slices in this box |
|
|
|
You create a new box around the last vertebra. |
|
|
|
And assign a label to the slices of that box. |
|
|
|
Once you have labelled the 2 extremities, the program will interpolate the labels for all the slices in between. |
|

If the interpolation is wrong, you can refine it by manually labelling a few more vertebra using the selection box and the Vertebral Label tool.
Note:
|
|
|
From the Keyboard
|
|
|
|
|
|
Key map |
Action |
|
|
|
|
|
|
. |
"." has been mapped to the command: "Side: Select".
Pressing the "." key while over a side view will change the current frame of a group to the frame at the corresponding position on the side view.
Alternatively, a double click on the desired location in the side view window will have teh same effect. |
From the Command Line
System Variables defined in this tool:
|
|
$SIDE_VIEW_SELECT_NB |
(U32) |
Number of frames inside the selection box. |
|
|
$SIDE_VIEW_SELECT_PT |
(P) |
Pointer to a list of frame pointers for the frames inside the selection box. |
|
|
$SIDE_VIEW_POINT_SIZE |
(F) |
Size of the points used in the "Volume" representation. (Default = 1.0) |
Text commands defined in this tool:
Slice: Select
Activating this command while the cursor is over a side view will change the current frame of a group to the frame at the corresponding position on the scout.
Note:
|
|
|