In this mode you can stamp geometrical shapes in the TAG images.
Each of these shapes has an associated TAG value. You can "Stamp" these shapes in the TAG image, either replacing the TAG value under them with the value associated with the shape, or adding (or subtracting) their associated value to the ones already present in the TAG image.
|
|
|
|
|
|
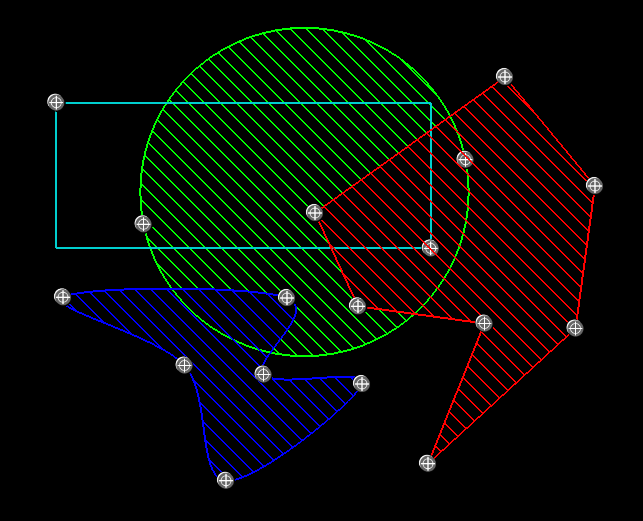
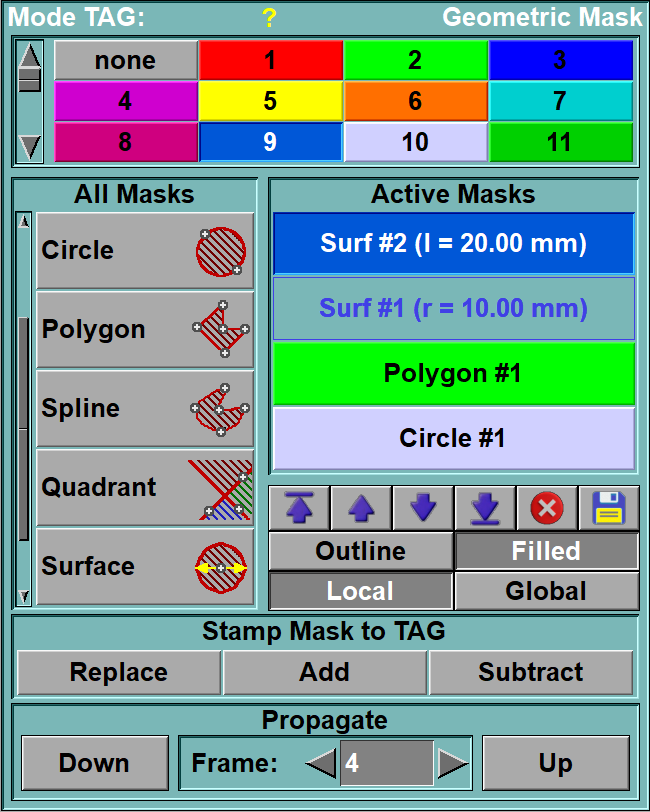
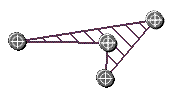
Geometrical Masks |
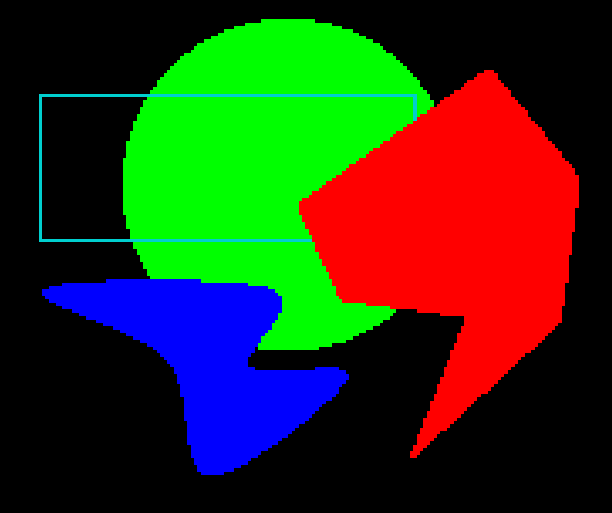
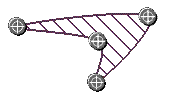
Result of the "Stamp: Replace" operation |
From the Graphic Interface
|
|
|
||||||
|
TAG Value |
Each mask has a tag value associated with it. You can select this tag value by clicking on the appropriate button before creating the mask, or you can select a mask from the Active Mask List and click on the tag value’s button you want to associate with it. This tool is also described in the "Interface tools" section of the introduction
|
||||||
Create Mask List |
Select the shape of the mask you want to create. Clicking on one of the buttons in the list will create the mask in the current image. You can then edit this mask with the mouse.
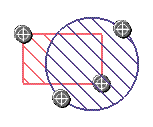
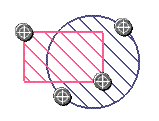
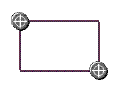
You have a choice of 8 basic mask shapes:
|
||||||
|
|
|
||||||
|
|
|
||||||
|
|
|
||||||
|
|
|
||||||
|
|
|
||||||
|
|
|
||||||
|
|
|
||||||
|
|
|
||||||
Active Mask List |
All the masks that are active for the current image will be displayed in this list. You can select one of these masks by clicking on its button. A number of operations can be done on the selected mask.
|
||||||
Delete the selected mask
|
|||||||
Write the information necessary to re-create the selected mask in a script file.
|
|||||||
Top/Up/Down/Bottom |
|
||||||
Outline/Filled |
|
||||||
Local/Global |
The mask can be present either only on the image where it was created or on all the images of the group where it was created.
|
||||||
Stamp Mask to TAG |
Use the geometrical shape of the masks to “stamp” the tag values. There are 3 sub modes to the stamping:
The tag values are limited to the range 0 to TAG_MAX. The Add and Subtract operation will not cause the tag values to go beyond this range.
|
||||||
Propagate |
Copy all local masks from one slice to the next. This operation will not affect global masks, since they are already present on all slices. This tool is also described in the "Interface tools" section of the introduction |

.png)

From the Display Area
When a new mask is created, it will be placed in its default position on the current image. You can edit this shape by dragging its control points.
You can also add control points to the polygon and spline shape by clicking on the border of the shape at the location where you want to insert the new point. You can remove a control point by placing the cursor over it and pressing the “del” key .
From the Keyboard
The following keyboard key can be used while in this module:
|
|
|
|
|
|
Key |
Function |
|
|
|
|
|
|
Delete |
If the cursor is over an instrument's control point, this pressing the "Delete" key will delete the instrument. |
From the command line
System Variables defined in this module:
|
|
$GEOM_MASK_CAPTURE |
(F32) |
Capture radius (in pixels). If clicking within this distance of mask's anchor point, the point itself is considered clicked. |
|
|
$GEOM_MASK_GLOBAL |
(U8) |
The masks are either local (=0) or global (=1). This variable is used as default value when creating new masks. |
|
|
$GEOM_MASK_FILL |
(U8) |
The masks are either outlines (=0) or filled (=1). This variable is used as default value when creating new masks. |
|
|
$GEOM_MASK_NB |
(U16) |
The number of created masks. |
|
|
$GEOM_MASK_LIST |
(A,P) |
Array of pointers to the masks. |
|
|
$GEOM_MASK_ACTIVE |
(P) |
Pointer to the active mask. |
Text commands recognized in this module:
Mask: Radius value
Change the default value (=10.0) of the radius for the "Surface" shape.
Mask: Side value
Change the default value (=10.0) of the half size of the for the "Square" shape.
Mask: Thickness value
Change the default value (=10.0) of the thickness for the "Line" shape.
Mask: t_mask Tag tag_num
Assign the TAG value "tag_num" to all the masks matching the template "t_mask".
Mask: t_mask Mode (global|local|outline|filled)
Assign the TAG value "global/local" or "outline/filled" to all the masks matching the template "t_mask".
Mask: t_mask Delete
Delete all the masks that match the template "t_mask".
Mask: t_mask Save file_name
Create a script file to re-create all the masks matching the template "t_mask".
Mask: t_frame Circle name a_x a_y ...
Mask: t_frame Polygon name a_x a_y ...
Mask: t_frame Quadrant name a_x a_y ...
Mask: t_frame Rectangle name a_x a_y ...
Mask: t_frame Spline name a_x a_y ...
Create the specified masks named "name" with the parameters "a_x", "a_y" etc on the frame matching "t_frame".
Mask: Propagate [up|down]
Propagate the result from the current frame to the next frame in the group, either up (the default) or down.
|
|
|