In this step, you will select one slice at L3. That slice will be the one segmented in the next step.
The Interface:
In this step, sliceOmatic is placed in Mode "Display 2D".
Two image windows are displayed On the left you have the side view, and on the right, the axial view in "Mode All".
The "Side View" tool is open.
What to do:
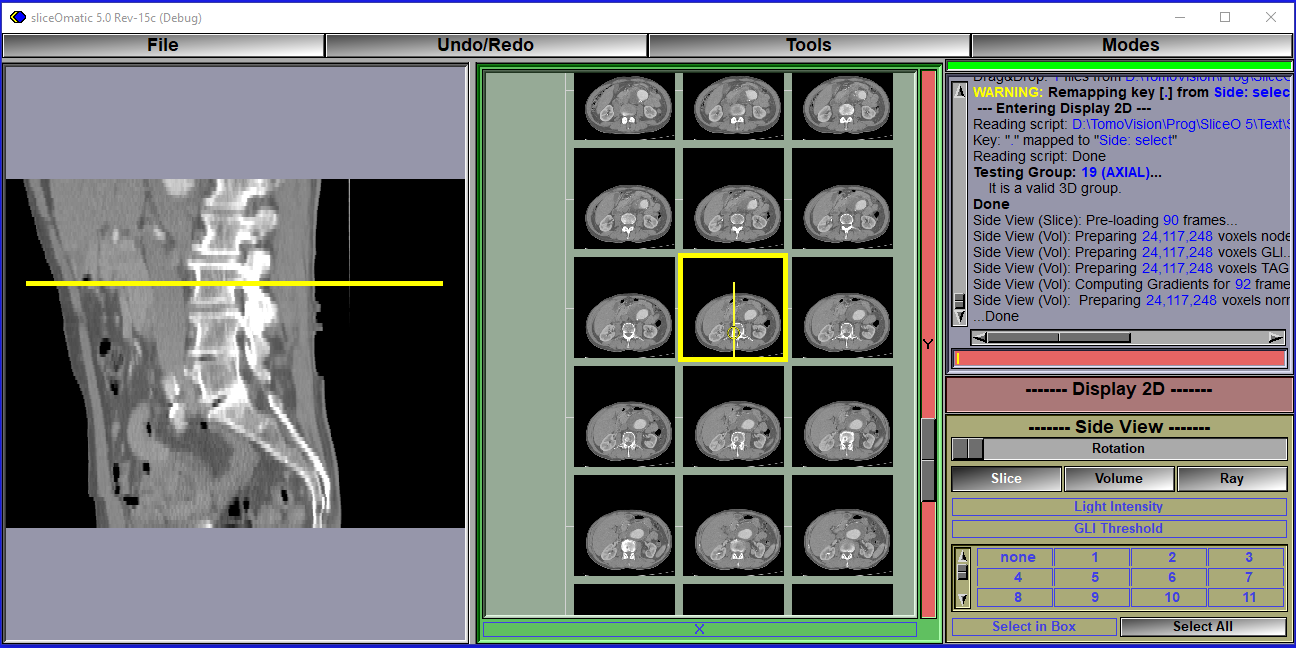
In this step, the image portion of sliceOmatic is split in 2 windows.
|
|
To select the desired slice at L3, use the following steps:
In the right window, the "current" slice will have a yellow border and display a circle crossed by a vertical line. The circle is the center of rotation of the cut plane for the side view image. By default it is located in the horizontal center and at 1/3 of the height of the image. This is where, most of the time, the vertebra are in the axial images. However, you can drag that circle with the mouse to the center of the vertebra if the default position is incorrect.
•Place the cursor over the L3 vertebra on the side view image (the left window) and either do a double click or press the "." (period) key on the keyboard. This will make the axial slice matching the position of the cursor be the "current" slice.
The slice displayed with the yellow border in the right window, the "current" slice, is the one that will be segmented in step 3. If it is not exactly the slice you want to work with, you can change it by selecting the right window (click on it) and pressing the "Page Up" and "Page Down" keys to go up or down the axial series.
This link to the Landmarking Guide: Axial explain how to chose the correct slice.
|
|
Note:
|
|
In the right hand window (the window with the green border): •You can cycle through the slices in the current series with the "Page Up" and "Page Down" keys. •You can cycle through the series in the current study with the "Home" and "End" keys. •You can use the "+" and "-" keys to change the size of the displayed images. |