In this step you will use the "Snake" mode to identify the inside of the legs and the bone in the leg.
|
|
|
|
|
|
|
Untagged MR Scan |
|
Tagged MR Scan |
/segment_goal_0.png)
/segment_goal_1.png)
What the script did for you:
The "Mode ALL" is enabled, showing all the slices.
The first frame (upper left corner) is the current frame
The Mixer class "Fat" bypass has been activated (the bone is easier to segment in the fat image)
The TAG labels have been modified:
The "TAG 1" is renamed "Leg".
The "TAG 4" is renamed "Bone".
The colors of the TAG have been modified:
TAG 1 is set to yellow-white
TAG 2 is set to green
TAG 3 is set to red
TAG 4 is set to white
The "Snake" mode interface is open.
The 4th brush size is pre-selected.
The TAG_1 (Leg) is made the current TAG value.
The polarity is set to "Polarity +"
The "Color Scheme" tool is open.
The color scheme is set to "Mix".
The "TAG Lock" tool is open.
All TAG locks have been removed.
The "Automation" tool is open. (All parameters of this tool have been set to do 10 "Snake: Propagate Up" at once.)
The "stop" condition is set to "Max count is reached"
The "Max count" is set to "10"
The "Loop delay" is set to "0"
The "Script" is set to "auto_propaget.scp", a script that contain the line "Snake: propagate up".
The tool is opene to the "Start" page.
What to do:
|
|
The Leg
First we will create the "Leg" snakes:
•Select the first slice from the series and press the "Space Bar" to toggle in "Mode One" and display only one slice.
•Blow up the slice ("+" key) until it fit the screen .
The 4th brush is selected, the TAG_1 ("Leg") is selected and the polarity should be "Polarity +".
•Press on the "Create New Snake" button.
|
|
/snake_create_a.png)
|
|
•Left click on a first position on the interface between the leg and the air.
|
|
/snake_create_1.png)
|
|
•Continue placing points around the circomference of the leg. the points must be placed in clockwhise order. Leave a gap between the last point and the first point.
|
|
/snake_create_2.png)
|
|
•Click on the "Minimize Energy" button.
A snake is now created around your leg.
|
|
/snake_create_3.png)
Note:
|
|
|
/snake_edit_1.png)
|
|
•Do the same thing on the other leg on the image, using the same sequence and placing clockwhise points.
|
|
/snake_create_4.png)
|
|
Propagate:
We can now propagate the 2 "leg" snakes we have on the first image on the other images. The "Propagate" interface has 2 buttons and a selector. The "Frame" selector show the current frame. The snakes from this frame will be propagate either "up" or "Down" to the next frame in the series. If you are at one extremitiy of the series, then one the buttons will be disabled since we can not go any further in that direction.
•Propagate the snake all the way up to the last frame in the series, correcting any errors in the snakes if they did not follow the oputside of the leg.
|
|
/snake_propagate_1.png)
|
|
Alternatively, since the snake propagate so well, we can do 10 propagate at once using the "Automation" tool.
•Press the "Start" button to activate 10 steps of "Propagate Up".
•Press the "Reset" button to reset the counter for the next time you want to use the Automation tool. |
|
/auto_start_0.png)
|
|
The Bone:
Now we will create the "Bone" snakes.
•Select the first slice of the series again (you can press the "Space Bar" to toggle to the "Mode All" mode, click on the first slice and press "Space Bar" again to return to "Mode One").
•Select the "Bone" TAG value.
|
|
/snake_bone.png)
|
|
•Select the "Polarity -" polarity.
|
|
/snake_polarity.png)
|
|
•Click on the "Create New Snake" button and place a few points (clockwhise) around the bone of one leg.
|
|
/snake_create.png)
|
|
•Place a few points (clockwhise) around the bone of one leg.
•Click on the "Minimize Energy" button and correct any erros in the snake.
•Do the same thing for the bone of the other leg.
|
|
/snake_bone_2.png)
|
|
Propagate:
•Now propagate the "Bone" snakes all the way down to the first slice of the series.
|
|
|
|
Snake to TAG:
And now we will fill the interior of these snakes with the matching TAGs.
•Change the display mode to see all the images (Press the "spacebar"). This will select all the images, so that the next action is applied to all the slices in the series.
•Press the "Snake to TAG" button.
|
|
/snake_but_to_tag.png)
The Interface:
|
|
The Snakes
Using the Snake mode, You will place snakes of color "Muscle" on both the left and right leg of the first image of the series.
Creating a snake is a little tricky.
The current TAG value will define the color of the snake.
The brush size used when creating a snake will influence the minimum curvature of the snake. So, to small a brush will result in to many details, while to big a brush will miss out some details.
The polarity of the snake will control how the snake latch to the best gradient. If the shape you want to segment is of a lighter color than the surrounding tissue, then the polarity is "Polarity +". if it is darker than the surounding tisue, then use "Polarity -" if the surounding tissues can be both lighter in some regions and darker in others, then use "No Polarity". The outside of the leg is on a black background, so the polarity is "Polarity +". The bone in the leg in an MR image is black on a lighter background, so the polarity is "Polarity -".
The direction of the points used in creating the snake is important! Snake points must be clockwhise for the outside of the snake and, if you want to create a hole in the snake, then create a counter-clockwhise snake of the snake TAG color. (For this application, we will only create holes in step 6).
If you create a snake inside another snake, the inside snake must have a higher TAG value than the outside one (in this case, the complete leg is TAG 1 (Muscle) while the bone inside the leg is TAG 4 (Bone)).
|
.png)
Note:
|
|
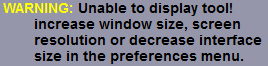
If the vertical resolution of your screen is inferior to 1000 pixels, it is possible that sliceOmatic can not display both the Sanke interface and the desired tools. If this is the case you will get a warning message in the text window.
You can fix this by either decreasing the size of the interface tools in the configuration interface, or selecting to have floating menus in the same interface. |
|
Note:
|
|
SliceOmatic keep track of your last 20 changes to the TAG data. You can undo your last changes with the "undo" button in the region growing interface, from the Undo/Redo menu or by pressing the "Ctrl Z" keys. You can also redo changes that where undone with the Undo/Redo menu or by pressing the "Ctrl Y" keys. |