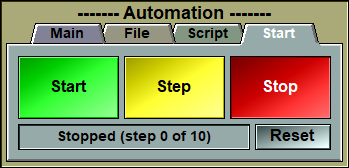
The Automation tool:
|
|
This tool enable you to automate some actions. It can be used to read files and perform scripts for each files, or perform scripts for each frames, or simply perform scripts a number of times. For example it can be used to take one snapshot of each frames.
You can find more info on this tool here.
|
|
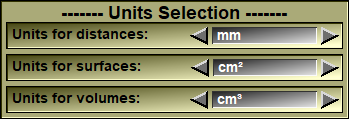
The Units Selection tool:
|
|
A number of tools and mode display and save dimension information. You can change the units used for these.
You can find more info on this tool here.
|
|
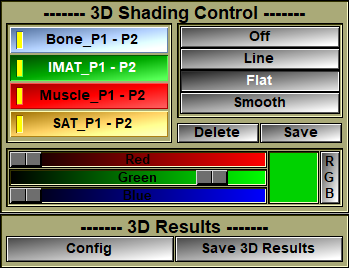
The 3D Shading tool:
|
|
This tool enables you to control the appearance of all the 3D geometries in sliceOmatic. From this tool, you can also delete or save individual geometries.
You can find more info on this tool here.
|
|
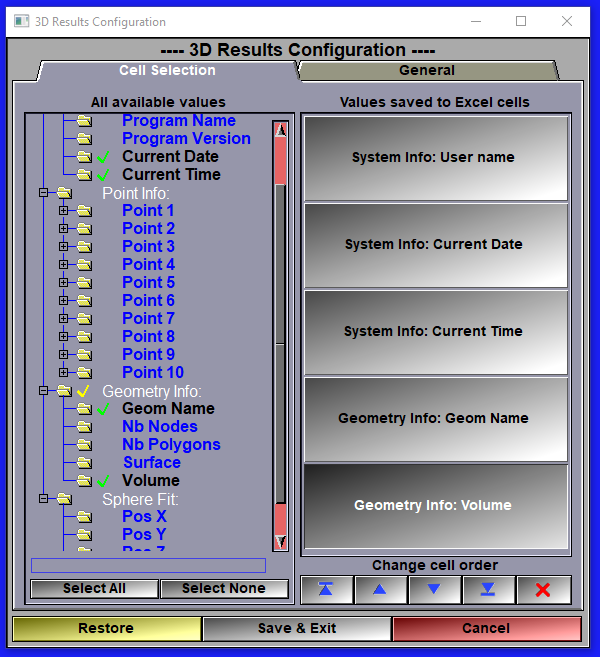
The 3D Results tool:
|
|
You can find more info on this tool here.
|
|

|
|
You first need to select the configuration of the Excel result file you wnat to create. You need to select the cells you want in the result file from the list of all available inofrmations on the left hand side.
Once you select all the cels you want in each line of the result file, you can then re-arange the order of these cells.
Your selection will be saved in a "Results_3D.scp" file in your user's directory when you click on the "Save & Exit" button.
After this step is done, you only need to click on the "Save 3D Results" to create a new file or append new lines to an existing file. If you do not change the configuration of the results line, then only the data will be appended to the file. If you did change the configuration, then a new set of header lines will be created before the new daya lines.
|
|
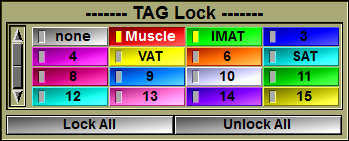
The TAG Lock tool:
|
|
After finishing analysis with a specific TAG color, use the TAG Lock tool to protect it. This tool allows colors already used to be locked so they are not overwritten when new colors with overlapping HU values are used.
To lock or unlock a color, in the TAG Lock box, click on the color that needs to be locked or unlocked. If the box has a yellow indicator, that TAG is locked
You can find more info on this tool here.
|
|
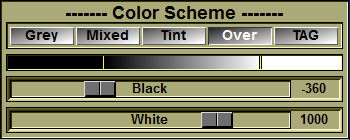
The Color Scheme tool:
|
|
By default, in this step the TAG colors are displayed using the "mixed" model (both the grey level values and the color are added together).
You can change way the TAG colors are displayed on the images with the "Color Scheme" tool interface. Or, you can also use the predefined keyboard shortcuts: oF1 = Grey oF2 = Mixed oF3 = Tint oF4 = Over
You can also use this tool's interface to change the brightness and contrast of the grey level images with the "black" and "white" sliders. |
|
|
|
|
|
|
|
|
|
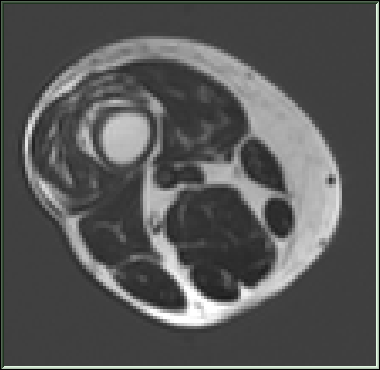
F1 (Grey) For analyzing boundaries between muscle and organs
|
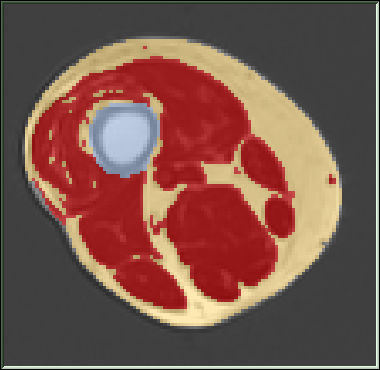
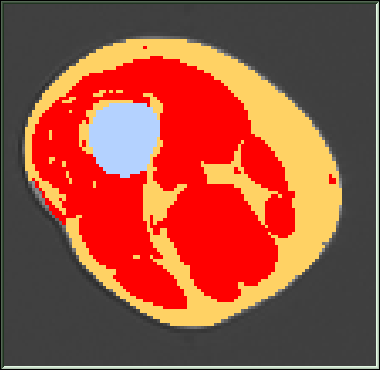
F2 (Mixed) Usually used for the actual process of colouring/tagging tissues
|
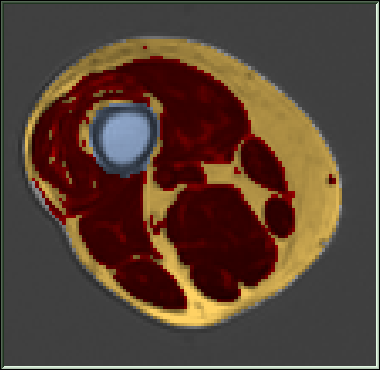
F3 (Tint) Good for checking errors and/or out of place pixels |
F4 (Over) Used for presentations |
|
|
Warning: Even though they are not visible, you can still edit the TAG values in this mode |
Note: With F2 and F3, you can change the color opacity with the "shift +" and "Shift -" keys.
|
|
|
Other useful tools:
The Tools drop down menu also contains many other useful tools:
|
|
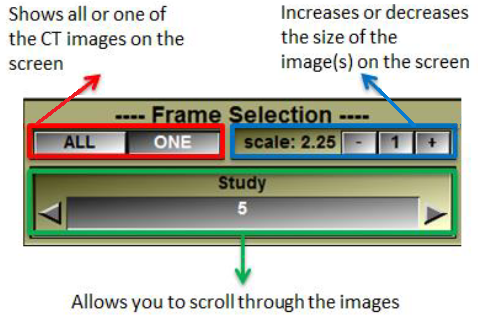
2D Frame Selection: used to scroll between images and change their size on the computer screen
Note: You can also decrease/increase the size of the images with the "+" and "-" key. You can toggle between "All" and "one" with the "Space Bar" key In mode "One" you can use the "PgUp: and "PgDn" keys to scroll through the images.
|
|
|
|
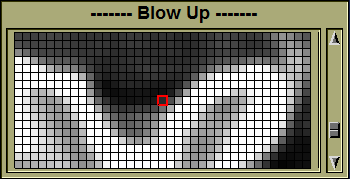
2D Blow Up: displays a magnified grid of the area under the cursor |
|
|
|
2D Pixel Info: shows different informations (among these, the GLI value) for the pixel under the cursor.
|
|
|
|
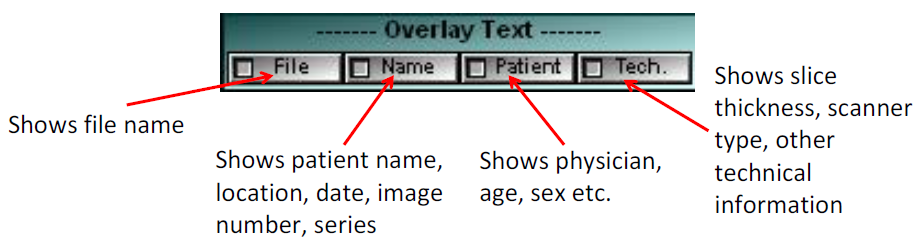
2D Overlay: used to determine the type of text information is presented on the images.
This tool is used to access information from the DICOM files, such as: •Patient Name •CT date •Slice thickness •Series and image numbers
It can be used to help anonymize images for publications, presentations, or posters. There are 4 buttons for the different options. These are also mapped to the keys "Shift F5" to "Shift F8". |
|